Shop Talk w Devin...

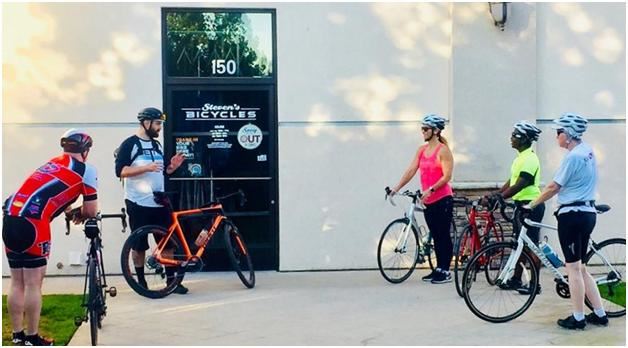
Let’s dive into the world of bicycle maintenance, safety, preparedness, and all things associated with cycling. My goal with this blog is to engage our local cycling community in discussions and improve your knowledge of your own bicycles. I believe everyone should have the skills to change a flat and should be familiar with how their bicycle works, plus what to do in case of an emergency. Join me as we go on this adventure together. My name is Devin Bovee I am, a father, a cyclist, a bike mechanic, a bike shop Manager and an advocate for people to get on their bikes. Reach out to me via email Devin@stevensbicycles.com or give me a call 559.797.0148.

<< First  < Prev   1   2   Next >  Last >> 
  • 01/30/2018 7:29 PM | Anonymous

      Should I Go Tubeless??

      The short answer is, yes! Making the move to tubeless is a terrific way to cut back on pesky flats and an excellent way to increase your bike's ride quality and efficiency. Ditching your comfort zone and going tubeless is nothing new for riders who regularly venture off-road. However, this has recently become popular within the road cycling arena.  For 2018 bike companies like Giant/Liv and Cannondale Bicycles now ship multiple road, cross and mountain models tubeless ready with sealant included in the box.

     There are multiple benefits to ridding yourself of the "tubed life": the biggest being its resistance to going flat on the next group ride or solo adventure. Tubeless tires are developed with a thicker sidewall and a tighter construction to help support your weight and to keep the sealant locked in. In fact, there are multiple tubeless sealant options these days. My favorite happens to be Orange Seal Endurance, but there are other brands like Stan's NO Tubes who also make a great tubeless tire sealant. If you are still not quite sure about ditching the tubes all together you can put some sealant into your tubes for a little added protection without the heavy weight of Slime. On multiple occasions I have pulled thorns and other random objects from my tubeless tires to be amazed that it sealed the hole. I am fully convinced that a tubed tire would have had me go through the road side flat changing procedure, you know what I'm talking about!  Another great benefit to riding tubeless is the benefit of running a lower air pressure and smoothing out the road along with reducing your rolling resistance and increasing handling. If you ride off-road, you are fully aware of how important a couple of psi points can throw off the handling of a bike or too low can make you burp a tire. This is relatively new to the road world seeing as how the ranges have been mostly 90psi for lightweight riders and up to 120psi for the heavier riders. Now we can bring the psi down for both ends of the spectrum while smoothing out the pavement and keeping the momentum.

     There are a few requirements for going tubeless however and the process is relatively simple for an experienced home mechanic or any of us in-shop mechanics. The necessities are having the proper rim or having a rim that can be sealed using tubeless specific rim tape, plus a tubeless valve while using the proper tubeless tire and sealant. One thing that you will need for most but not all setups is an air compressor or a floor pump with a separate high-pressure canister. There are some tire and rim combinations that are a bit trickier to set the bead on, for these you will need to use a high-volume air flow chuck forcing air through the removed valve core to set the bead; don't let a couple popping sounds scare you too much as the bead sets!  As recent as two years ago, it was extremely hard to find a decent tubeless road tire. Now you can walk in and select a pair based on flat resistance, whether you want a lightweight race day tire or a combination of both lightweight and light puncture resistance. Keeping up with the sealant levels is important, in the hotter months you will need to pay closer attention to the amount of liquid sealant you have left in your tires. A good rule of thumb for the summer months is just to check once a month using a small zip tie through the removed valve core like a dip stick. In the colder or winter months checking every couple of months will suffice just fine. Keep in mind that you will lose a small amount of sealant every time you pump up your tires and every time you knowingly and unknowingly get a puncture.

     Making the switch to tubeless may not be for everyone but in my opinion, it is a far better system than the standard tube and tire combination.  If you have any questions or concerns, you can always call or come into the shop and we can discuss all aspects of making the switch and whether your setup is the best to do it with.  I still carry a tube and a saddle bag but it's mostly for my riding buddies, not me.

    Devin Bovee  

    Devin@stevensbicycles.com

    559.797.0148

  • 01/14/2018 7:19 PM | Anonymous

    Gravel Cycling

       More and more people are getting into riding bikes both on-road and off-road. Some people have been doing this forever and a lot of people are new to it.  One of the great benefits to riding both on and off road is the fact that you can ride your bike in places not normally reserved for riding. Typically, the only bike lanes that you’ll see are the ones painted on the road you take to your local trail, fire road, canal bank or dirt road.  

       People often ask what type of bike they should ride if they plan on covering both paved and unpaved roads, and if they could ride their current road or mountain bike. The answer is more complicated than a yes or no.  It really depends on the type of terrain you are going to ride:

    If you are going to be riding very mellow gravel roads, then a road bike with 28c tires might be okay. It would depend on your skill and comfort level, but it’s generally not preferred… just in case you come across something rougher.   

    If you are riding more technical terrain such as trails and sandy areas, you will want a bike that can accommodate a bigger tire (at least a 700x33), to give you greater stability.

    Cyclocross bikes seem to be the best suited for handling most situations that you come across. These are light enough to attack the climbs and tough enough to take a beating.

    Lately, gravel specific bikes are becoming popular in todays market. These bikes typically have a taller headtube, bigger tire clearance and can usually handle a 650b or 700c wheel. People who typically use a 650b tire opt for a size around 47c. This size will allow the bottom bracket to still have some clearance and put more rubber to the dirt, while also smoothing out the rough terrain and allowing for more grip in technical sections.

    A few of the best technological advances within recent years is disc brakes on cross/gravel bikes, 12mm thru axles along with the 1x drivetrain with a wide range of gearing options.

        Half of the fun of riding both paved and unpaved roads is planning out your route.  Or better yet, not planning and just going out to explore.  Whatever bike you choose to be your “graveler,” just make sure (like with any other bike) that it suits your style of riding and that you are not going to outgrow it within the first few months. Skills change and evolve and having a bike that can meet those skills will save you a bunch of money and increase the fun!   

    -Devin Bovee   Devin@stevensbicycles.com   559.797.0148

  • 01/01/2018 9:40 AM | Anonymous

    Cleaning Your Bike

     Let’s dive in and go over the most basic of maintenance topics: How to clean you bicycle, and how to care for it after the wash.

     We'll start with some items that you will need to wash your bike with:

    • A repair stand or some place to set your bike that allows you to easily reach all the areas of your bike without straining your back,
    • A bucket with your favorite bike wash like Finish Line, Giant or any bike specific brand that you like.  PLEASE... no dish soap!!
    • Some water,
    • Bike-specific washing tools like Park BCB-4.2 or Pedro’s brush kit. These kits should be available at any of our local bike shops.
    • You will also need a few rags to dry the components and a separate one for the non-greasy parts of the bike.
    • A bottle of Tri-Flow, chain lube, degreaser and your favorite polish/finisher but we will hit those later.

     The first thing: set your bike in an area that will allow you to spray water and move completely around the bike. Once you get the perfect spot picked out, set up your repair stand and clamp the dirty bike in. If you’re comfortable with it, remove the front and rear wheels (This will allow you to clean the rear triangle and inside the fork easier). Now, grab the hose and put some of your favorite bike wash in a bucket and top it off with water. Since we have the hose out, let’s move over to the bike and with a light mist, spray your bike down. 

     Spray the wheels and all the greasy parts, keep the water at a minimum around the bottom bracket, headset and hubs since those areas contain bearings. Reach into your tool kit and grab the brush with the black bristles (this is for the gunked-up pulleys, rear derailleur, front derailleur, cassette, crankset, chain and any other greasy hard-to-reach areas). The bottle of degreaser will come in handy when cleaning these areas, since it will help to break down the dirty grease and keep the elbow grease to a minimum. 

     Once we have all greasy areas cleaned, spray them down one last time and move onto the other parts of the bike, to bring back that beautiful paint job! Using the soft brush, dip it into your bucket, and scrub under the bottom bracket, stem, handlebars, under the saddle, the entire frame and wheels. Keep going back to your bucket of cleaner until satisfied and then lightly mist the bike wash and gunk away. Take your rag for the greasy components and dry them first,:this is your chance to get the extra mess you may have missed. Now let’s dry the frame and wheels.

     Since everything is now dry, take a step back and admire your work... great job! We aren’t quite done though.  When we washed our bike, we also washed out all of the vital lubricants and frame protectant. Remember the Tri-Flow, chain lube and bike polish I mentioned? Here is when we apply those. Take your bottle of Tri-Flow with the little hose on it, and apply a couple of drips into the pivots on both derailleurs, pedals, rim brake pivots (Non-disc) and any other moving part of your bike (except the chain). Grab your favorite chain lube, and apply this as directed to the chain. Let it sit for a moment then wipe off the excess. The finishing step is to spray some bike polish on a clean rag and wipe down your bike frame and anywhere else you feel necessary. 

     That’s it! Now your bike is clean and ready to ride again.

     Keeping your bike clean will help you learn about your bike.  You will come to know every square inch of it, and possibly spot any issues before they become too serious. Keeping a clean drivetrain will also help extend the life of your drivetrain, improve shifting and keep the squeaks away. When we wash the wheels we also wash away the dirt that can grind down the brake pads and rim surface like sand paper extending the life of those as well. Keep your bike and parts clean, and they will reward you. If all of this seems like too much work bring it down and we can do a professional wash and lube job on it as well! 

<< First  < Prev   1   2   Next >  Last >> 
Powered by Wild Apricot Membership Software